
(TL;DR — I’ve created some scripts to make this all easy. Scroll down to the bottom of the post.)
When you install Team Foundation Server 2018 (TFS2018), the installer gives you the option to configure TFS to use HTTPS with a self-signed SSL certificate. This is a good thing. When given the choice between installing in HTTP mode with no security or installing in HTTPS mode, the choice is obvious and security wins. But life is never easy, right? This SSL with a self-signed certificate thing is not without a couple headaches.
HTTPS with Self-Signed SSL Certificate Headaches
Headache #1: When you connect to TFS using your browser, your browser complains about the SSL certificate being untrusted and unsafe. Basically it puts up a scary warning and you click ignore. It's not the end of the world but it's annoying. This is a minor headache.
Headache #2: By default, Git hates self-signed SSL certificates. If you try to do any actions against your repo -- for example, a "git clone" -- it says something like "SSL certificate problem: unable to get local issuer certificate" and quits. This is a major headache.
Headache #3: Are you using Git through Visual Studio? Well, it's not really any better here either. Since Visual Studio talks to Git, you'll get pretty much the same error message as if you made the call on the command line. Another major headache.
Some Good News, Some Bad News, & Some More Good News
TL;DR -- I've created some scripts to make this all easy.
Good news! There are some steps that you can do to get around these issues with Git...but they're a little bit manual and a little out of date.
Bad news! Those steps don't work at all because there's a bug in Team Foundation Server 2018 (TFS2018.0).
Good news! I collaborated with a handful of people at Microsoft over the last few weeks. They agree it's a bug and we've got a workaround. Plus, this bug is going to be fixed in TFS2018 Update 1 (TFS2018.1). Getting this fix was a team effort. Huge thanks to the following people at Microsoft for getting this knocked out: Johannes Schindelin, Ed Thomson, J Wyman, Philip Kelley, and Aaron Hallberg. Extra big thanks to Grant Holliday for the New-SelfSignedCertificate logic.
The PowerShell Scripts
There are four scripts to make this work. All of these scripts need to be run using using PowerShell running as an administrator. Script 1 and Script 2 need to be run on the TFS application tier machine. Script 3 and Script 4 need to be run on any developer workstation or build server that is going to talk to the Git repository that's running with the self-signed certificate.
01-fix-tfs-self-signed-cert.ps1
This script is the workaround/fix for the TFS2018.0 bug. It generates a new self-signed SSL certificate for TFS2018 and then installs it into IIS.
02-export-iis-self-signed-cert-to-file.ps1
This script exports the SSL certificate that is being used by TFS2018. This script assumes that TFS is the only IIS application on the server with https enabled. This script outputs the SSL certificate in two formats to two different files: exported-from-tfs.cer and exported-from-tfs-for-gitconfig.txt. Exported-from-tfs.cer is the CER formatted certificate that will be used in script #3 and imported to the user's trusted root certificates. Exported-from-tfs-for-gitconfig.txt is the certificate formatted so that it can be added to Git's ca-bundle.crt file by script #4.
03-import-iis-self-signed-cert-from-file.ps1
This script imports the self-signed certificate and put it into the trusted root certificate store for the current user. This is helpful because it means that 1) your web browsers (IE, Chrome, Edge, etc) will trust the self-signed certificate and 2) Git will be happy and trust the cert if you're using 'schannel'.
04-update-gitconfig-and-add-cert-to-ca-bundle.ps1
This script configures Git so that it trusts the trusts the self-signed cert using OpenSSL. It takes the ca-bundle.crt that is used by Git on Windows, copies it to your user profile directory, modifies your .gitconfig to use this new custom certificate store, and then adds the self-signed cert to the custom certificate store. As of 12/15/2017, running this is NOT required if you use 'schannel' with Git on the command line but it IS required for using Git via Visual Studio.
How to Use the Scripts
Here's how you use the scripts.
- Log on to your TFS application tier machine.
- Download the zip file containing the scripts
- Extract the zip
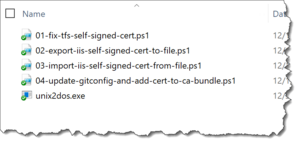
You should see a directory that looks like this.
- Run PowerShell as an adminstrator
- CD to the directory that contains the scripts (for example: "cd \temp\fix-tfs-and-git-self-signed-certs")
- Run 01-fix-tfs-self-signed-cert.ps1
- Run 02-export-iis-self-signed-cert-to-file.ps1
If you look at that directory, you should see that there are two new files: exported-from-tfs.cer and exported-from-tfs-for-gitconfig.txt.

Next, you'll run script #3 and script #4 on whatever machines need to talk to Git.
- Copy the entire directory and all the files in that directory to the machine that needs to talk to Git
- Run PowerShell as an adminstrator
- CD to the directory that contains the scripts (for example: "cd \temp\fix-tfs-and-git-self-signed-certs")
- Run 03-import-iis-self-signed-cert-from-file.ps1
At this point, if you only use Git from the command line using 'schannel', you're all set. Git should be happy and when you connect to the TFS website, all your browsers should be happy. If that's your life, then you don't need to run the last script.
As of 12/15/2017, the Git integration via Visual Studio still uses OpenSSL. If you need Git to work through Visual Studio, you need to continue.
- Run 04-update-gitconfig-and-add-cert-to-ca-bundle.ps1
That's it. You're done. Try a "git clone" using the command line. Try some git operations using Visual Studio. It should all work.
Summary
If you're hosting Git with a self-signed SSL certificate, things can get a little hairy. If you're using Git on TFS2018 with a self-signed SSL certificate, there's a bug with the generated certificate that Git just plain hates. The fix for this TFS2018 SSL certificate bug is coming in TFS2018 Update 1 (TFS2018.1) but you can fix the problem now by running a PowerShell script.
Once again, here's a link to download the powershell scripts.
I hope this helps.
-Ben
-- Looking to migrate from TFVC to Git or maybe from on-prem TFS to the cloud (VSTS)? Need some training on Git? Are you running into problems using Git in your TFS or VSTS DevOps pipelines? We can help. Drop us a line at info@benday.com.