
[TL;DR -- You need an Azure Resource Manager Service Endpoint and some values from Azure. There's a link to a PowerShell script at the bottom of this post that'll help. You'll probably still need to read this blog post though. Sorry. I know. Reading is hard.]
Deploying from Visual Studio Team Services (VSTS) to Azure is easy. You pretty much just have to log in and click a few buttons and you've got a continuous deployment release pipeline from VSTS to Azure. If you're using on-premise TFS, deploying to Azure from a TFS Build or a TFS Release is nowhere near as easy. VSTS is easy because if you're using VSTS, it's already in Azure and it already knows about your Azure accounts and subscriptions.
On-premise TFS doesn't know *ANYTHING* about your Azure resources unless you tell it.
A TFS-to-Azure Resource Manager Service Endpoint
In order to connect on-premise TFS to Azure, you need to create a Resource Manager Service Endpoint.
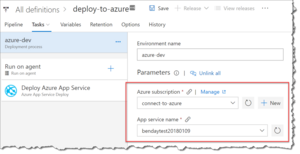
Let's say that you want to deploy to an Azure App Service. Typically, you'd start your deployment journey by creating a build and a release. Into that release definition, you'll add a Deploy Azure App Service task.
[caption id="attachment_9649" align="alignnone" width="300"]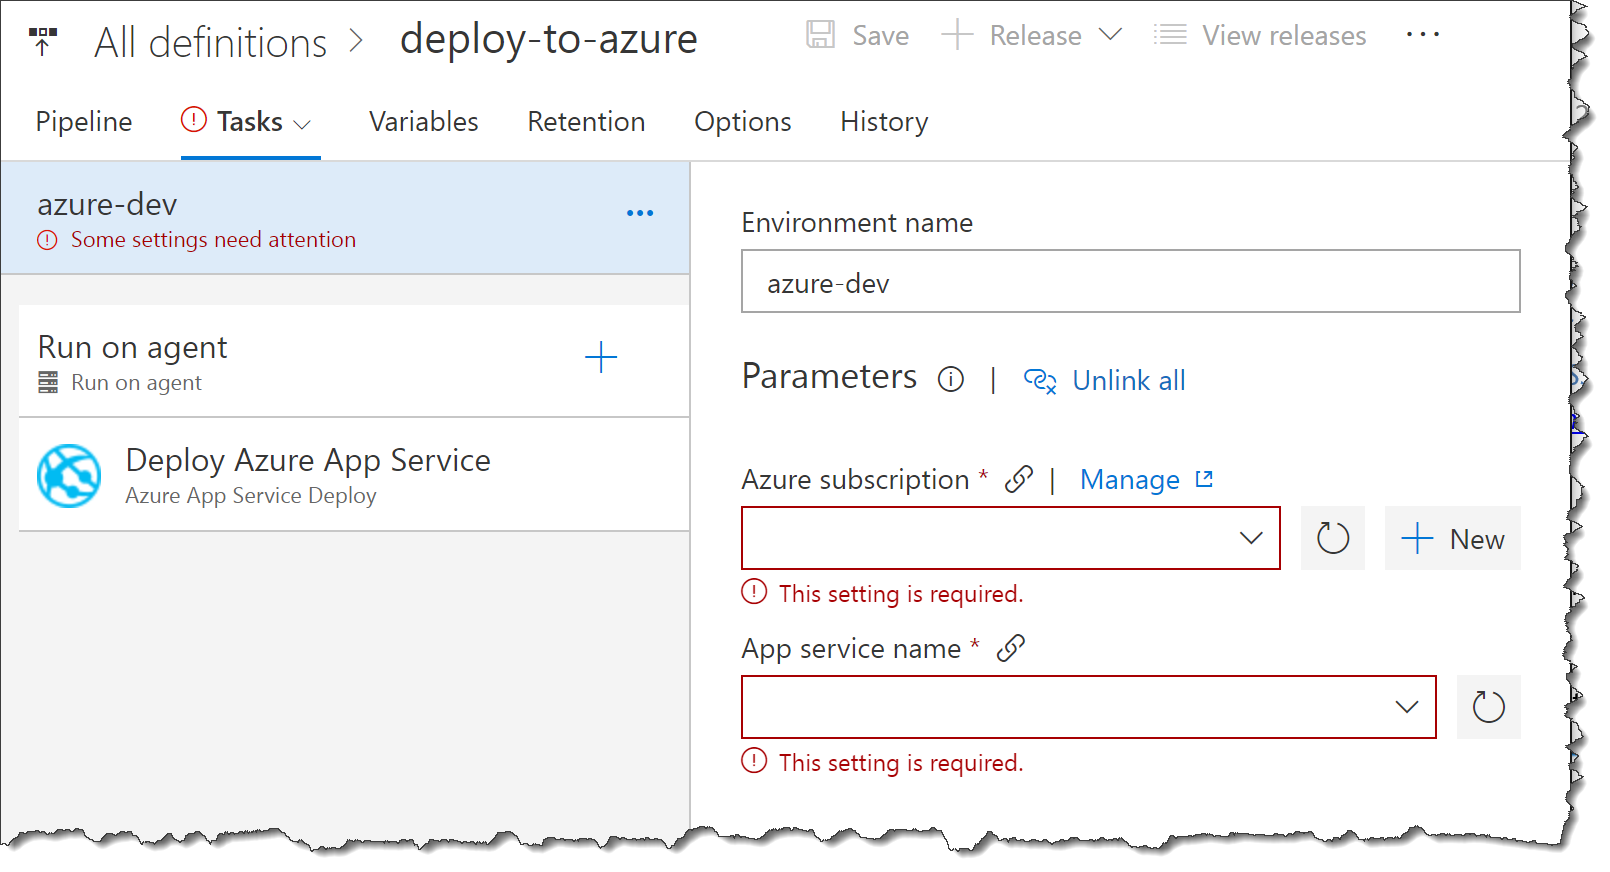 A Deploy Azure App Service task in a release definition[/caption]
If you were doing this in VSTS, you'd simply choose your Azure subscription and app service from those dropdown boxes and you'd be done. If you're in TFS, these dropdown boxes are going to be empty. There's a link to the right of the Azure subscription box that says Manage. Click it.
[caption id="attachment_9650" align="alignnone" width="300"]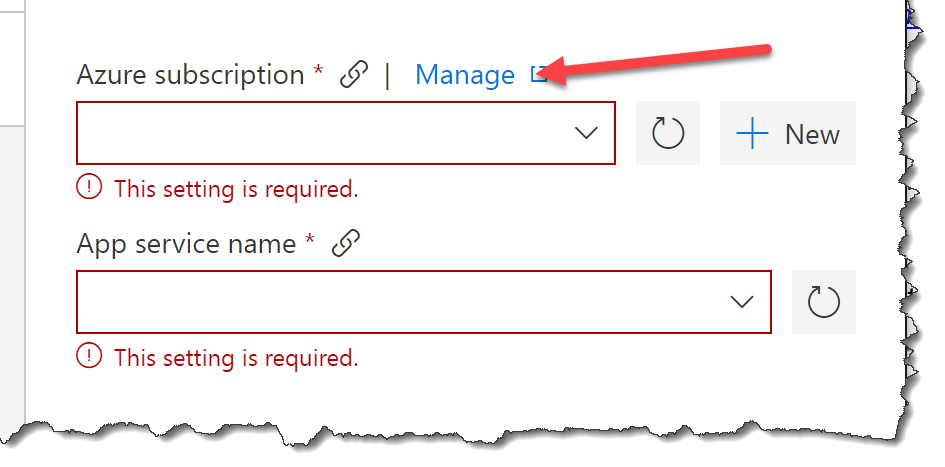 Click Manage on the Azure Subscription box[/caption]
If you click on the Manage link, it'll bring you into the list of service endpoints in TFS. There's probably nothing there.
[caption id="attachment_9651" align="alignnone" width="400"]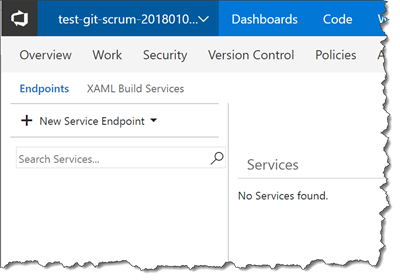 The list of Service Endpoints is empty[/caption]
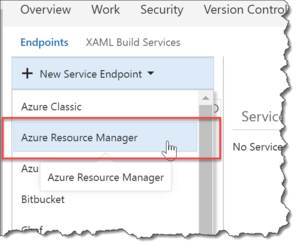
In the left panel, there's a button that says New Service Endpoint. Click New Service Endpoint and choose Azure Resource Manager.
You should now see a dialog for creating an Azure Resource Manager Service Endpoint. If you're like me, this dialog looks intimidating and unhelpful. (You're right.) When I first saw this dialog, I had no clue where I'd find the values for "service principal client id", "service principal key", and "tenant id". What's super fun about this dialog is that the names of the values here don't match the names of the values in Windows Azure. (Neat, huh?)
[caption id="attachment_9653" align="alignnone" width="300"]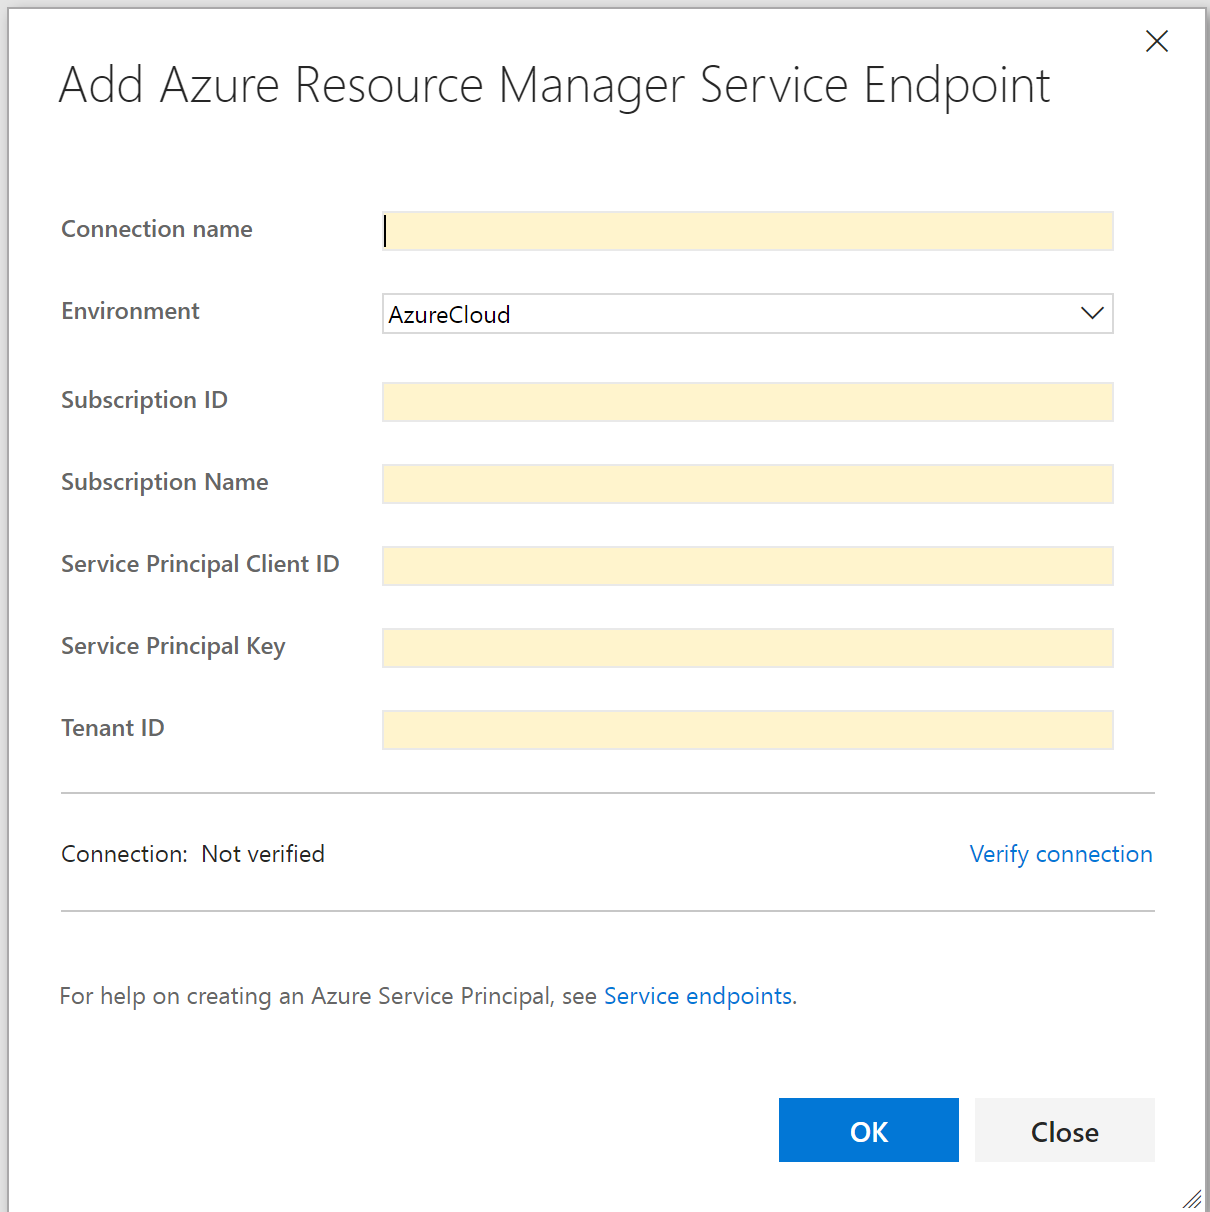 The Add Azure Resource Manager Service Endpoint dialog in TFS[/caption]
Getting the Values for the Service Endpoint Dialog
So where do you get the values? Well, I created a PowerShell script that will create the things you need in Windows Azure and then gather all the values.
Import-Module AzureRM
Import-Module Azure
Import-Module AzureRM.Resources

# change this value to be your azure subscription id
$azureSubscriptionId = "<YOUR-SUBSCRIPTION-ID-GOES-HERE>"

# this is the friendly-ish name and info for your application
# NOTE: this is the name of the Active Directory Application not the AppService
$activeDirectoryApplicationDisplayName = "hello-world-20180109"
$activeDirectoryApplicationHomePage = "http://helloworld.com"
$activeDirectoryApplicationIdentifierUris = "http://helloworld.com/hello-world-20180109"

####
# This function via
# https://www.sabin.io/blog/adding-an-azure-active-directory-application-and-key-using-powershell/
####
function Create-AesManagedObject($key, $IV) {

$aesManaged = New-Object "System.Security.Cryptography.AesManaged"
 $aesManaged.Mode = [System.Security.Cryptography.CipherMode]::CBC
 $aesManaged.Padding = [System.Security.Cryptography.PaddingMode]::Zeros
 $aesManaged.BlockSize = 128
 $aesManaged.KeySize = 256

if ($IV) {
 if ($IV.getType().Name -eq "String") {
 $aesManaged.IV = [System.Convert]::FromBase64String($IV)
 }
 else {
 $aesManaged.IV = $IV
 }
 }

if ($key) {
 if ($key.getType().Name -eq "String") {
 $aesManaged.Key = [System.Convert]::FromBase64String($key)
 }
 else {
 $aesManaged.Key = $key
 }
 }

$aesManaged
}

####
# This function via
# https://www.sabin.io/blog/adding-an-azure-active-directory-application-and-key-using-powershell/
####
function Create-AesKey() {
 $aesManaged = Create-AesManagedObject
 $aesManaged.GenerateKey()
 [System.Convert]::ToBase64String($aesManaged.Key)
}

$servicePrincipalKeyValue = Create-AesKey

$keyId = [guid]::NewGuid()

# $psadCredential = New-Object Microsoft.Azure.Commands.Resources.Models.ActiveDirectory.PSADPasswordCredential
$psadCredential = New-Object Microsoft.Azure.Graph.RBAC.Version1_6.ActiveDirectory.PSADPasswordCredential

$startDate = Get-Date
$psadCredential.StartDate = $startDate
$psadCredential.EndDate = $startDate.AddYears(1)
$psadCredential.KeyId = $keyId
$psadCredential.Password = $servicePrincipalKeyValue

$keyValueFilename = "key-value-$keyId.txt"

$servicePrincipalKeyValue | Out-File .\$keyValueFilename

#Login to Azure
Add-AzureRmAccount

Write-Output "Calling Get-AzureRmSubscription to get list of all subscriptions for debugging purposes..."
Get-AzureRmSubscription
Write-Output "***"

Write-Output "Getting subscription using Get-AzureRmSubscription..."

$subscription =
 (Get-AzureRmSubscription -SubscriptionId $azureSubscriptionId)

Write-Output "Requested subscription: $azureSubscriptionId"

$subscriptionId = $subscription.Id
$subscriptionName = $subscription.Name
$tenantId = $subscription.tenantId

Write-Output "Subscription Id: $subscriptionId"
Write-Output "Subscription Name: $subscriptionName"
Write-Output "Tenant Id: $tenantId"

Write-Output "Calling Set-AzureRmContext..."
Set-AzureRmContext -SubscriptionId $subscriptionId -TenantId $tenantId

#create SPN
Write-Output "Calling New-AzureRmADApplication..."
New-AzureRmADApplication -DisplayName $activeDirectoryApplicationDisplayName -HomePage $activeDirectoryApplicationHomePage -IdentifierUris $activeDirectoryApplicationIdentifierUris -PasswordCredentials $psadCredential -OutVariable app

Write-Output "Got application..."
Write-Output $app

$servicePrincipalClientId = $app.ApplicationId

Write-Output "Calling New-AzureRmADServicePrincipal..."
New-AzureRmADServicePrincipal -ApplicationId $app.ApplicationId -OutVariable servicePrincipal

Write-Output "Got service principal..."
Write-Output $servicePrincipal


Write-Output "Pausing for a bit to let New-AzureRmADServicePrincipal catch up before adding role assignment..."
Start-Sleep -s 10

Write-Output "Calling New-AzureRmRoleAssignment..."
New-AzureRmRoleAssignment -RoleDefinitionName Contributor -ServicePrincipalName $app.ApplicationId.Guid -OutVariable roleAssignment

Write-Output "Got role assignment..."
Write-Output $roleAssignment

Write-Output "Reloading what we just created..."

Get-AzureRmADApplication -DisplayNameStartWith $activeDirectoryApplicationDisplayName -OutVariable reloadedApp
Get-AzureRmADServicePrincipal -ServicePrincipalName $reloadedApp.ApplicationId.Guid -OutVariable SPN

Write-Output "Here's the SPN..."
Write-Output $SPN

Write-Output ""
Write-Output "************************"
Write-Output ""
Write-Output "Here's all the info you need."
Write-Output ""
Write-Output "Subscription Id: $subscriptionId"
Write-Output "Subscription Name: $subscriptionName"
Write-Output "Service Principal Client Id: $servicePrincipalClientId"
Write-Output "Service Principal Key: $servicePrincipalKeyValue"
Write-Output "Tenant Id: $tenantId"
Write-Output ""
Write-Output "Key value is also written to $keyValueFilename"
Before you run the powershell script, you'll need to get the Subscription ID for your Azure Subscription and plug it into the script where it says "
[caption id="attachment_9654" align="alignnone" width="300"]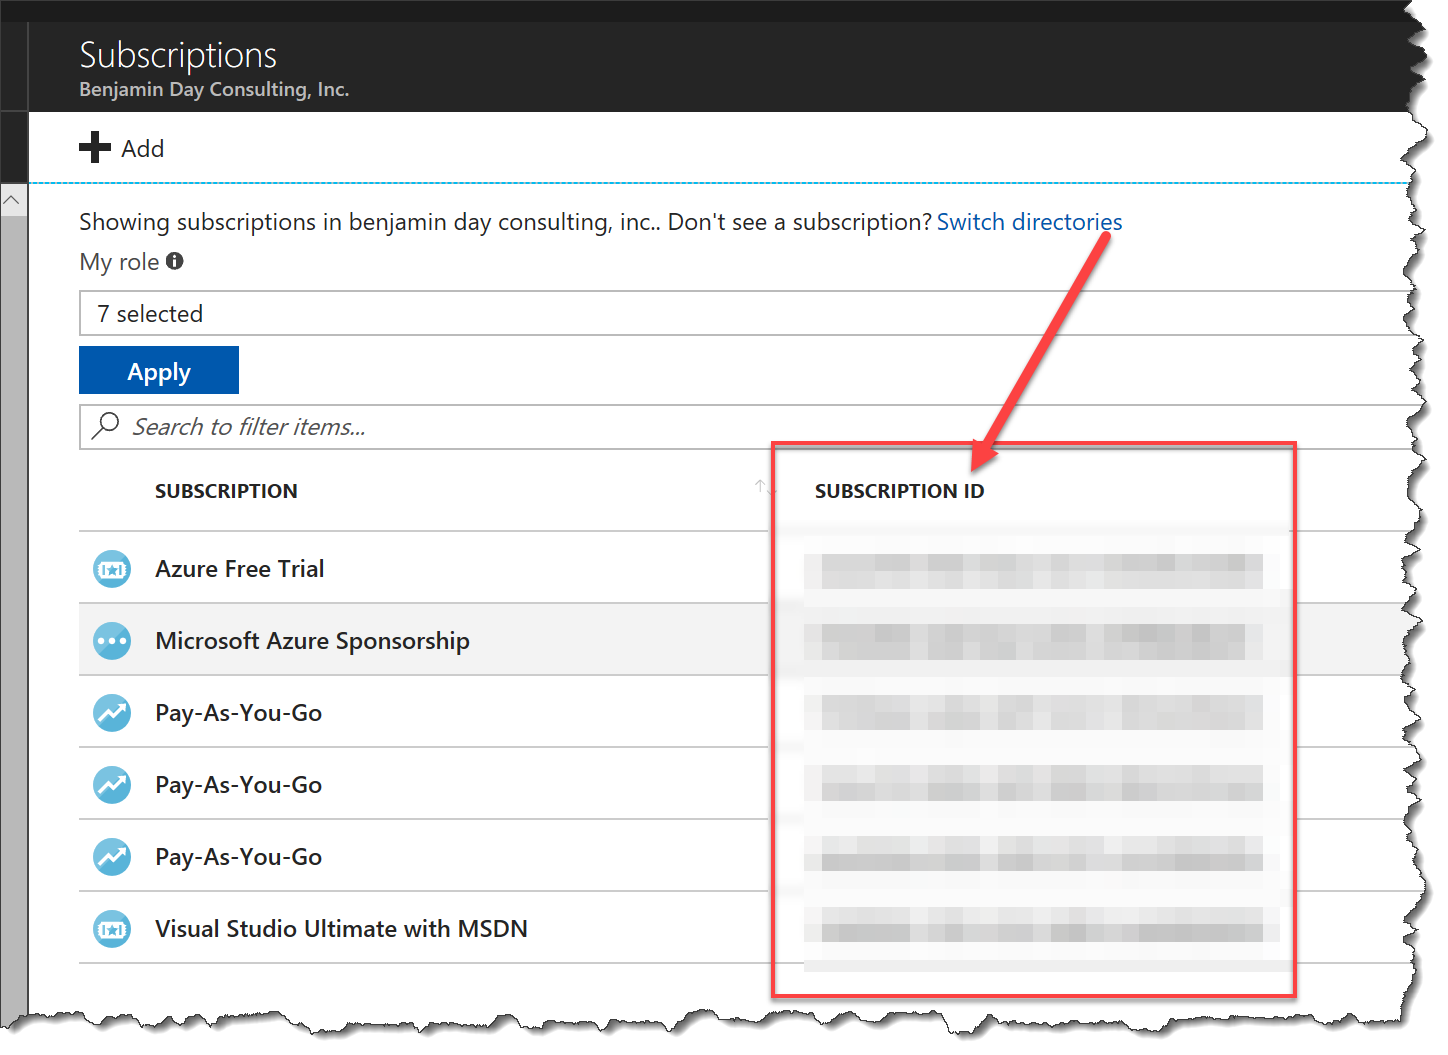 List of Azure Subscriptions and Subscription IDs[/caption]
When you run the powershell script, it'll prompt you to log in to your subscription. NOTE: if you get an error that says something like "Powershell script Import-Module : The specified module 'AzureRM' was not loaded because no valid module file was found in any module directory" then you need to install the Azure PowerShell modules by running "install-module azurerm -allowclobber".
When the PowerShell script finishes running, you'll see a bunch of values at the bottom of the script with a message that says "Here's all the info you need."
[caption id="attachment_9655" align="alignnone" width="300"]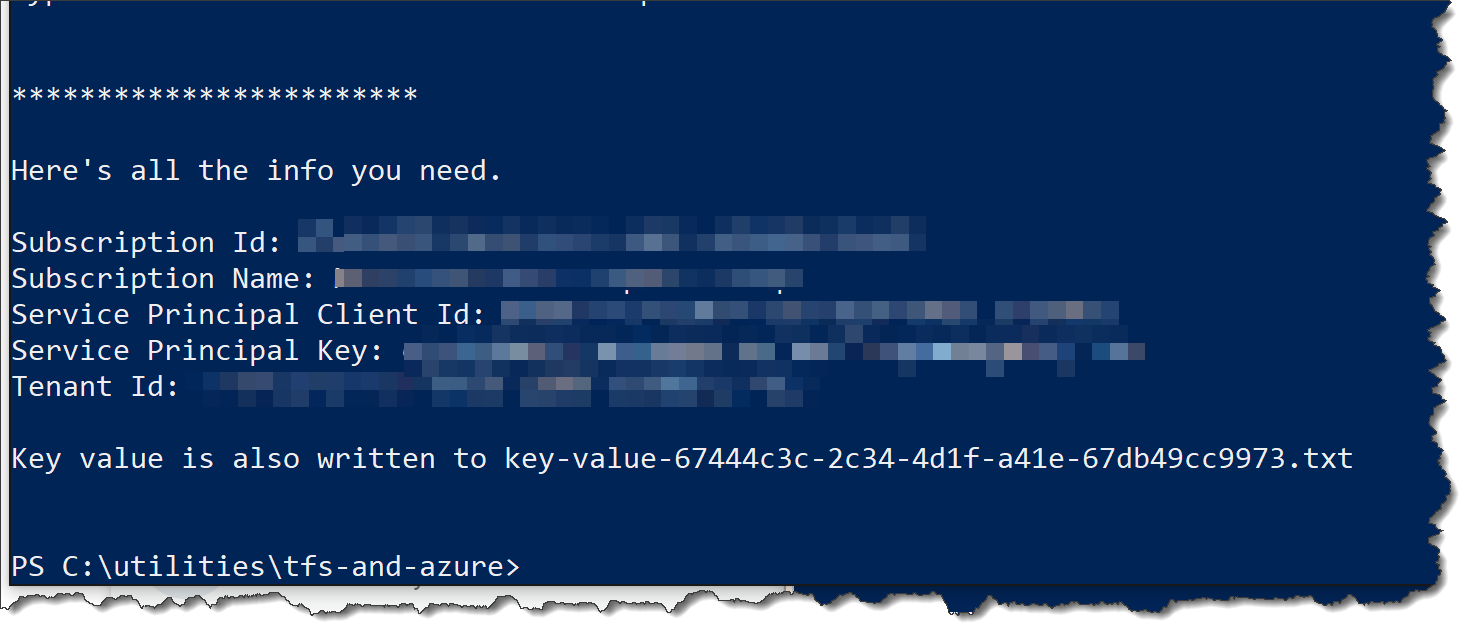 The results of the PowerShell script[/caption]
Populate the Add Azure Resource Manager Service Endpoint Dialog
Plug the values from the PowerShell script output into the Add Azure Resource Manager Service Endpoint dialog and click Verify connection. The connection should say verified.
[caption id="attachment_9656" align="alignnone" width="300"]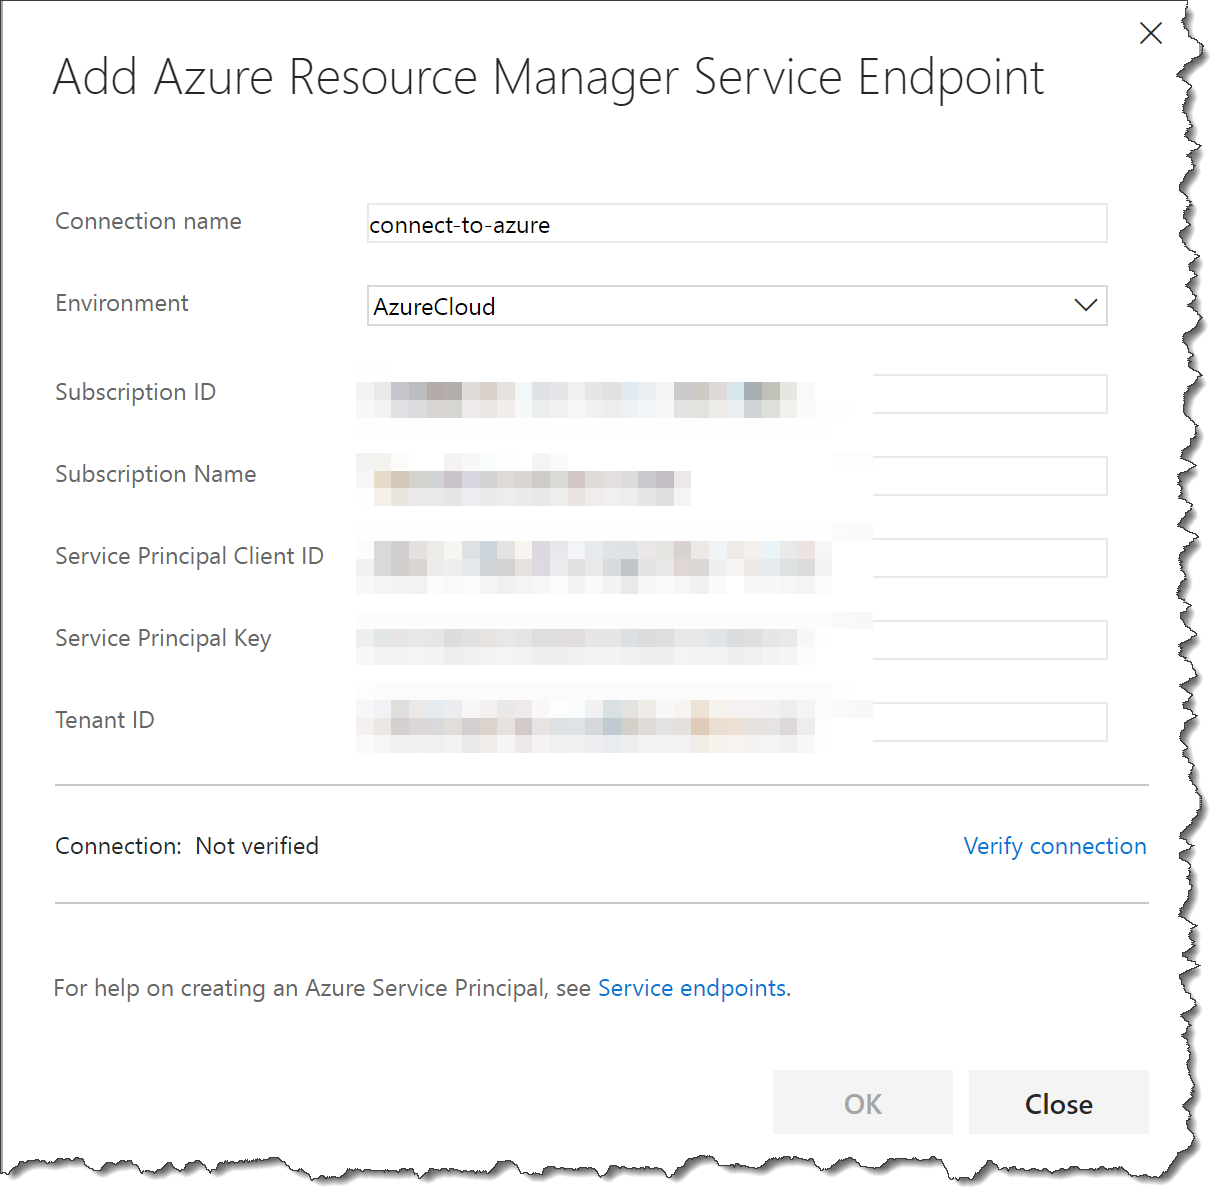 Plug the values from the PowerShell script into the Azure Resource Manager Service Endpoint dialog[/caption]
When you go back to the editor for your Release, the Azure subscription and App service name dialogs should now have values.
Subscription info is populated nowFrom here, you can pretty much just continue on and deploy to that Azure Subscription from TFS as you see fit.
What did this actually do?
If you're curious what this script actually did, you can check it out in the Azure Portal (http://portal.azure.com). The script does two big things: 1) creates an application registration in your Azure Active Directory, and 2) grants that Contributor permissions for your Azure App Service.
To view the changes in Azure Active Directory (AAD), go to the portal, and go to Azure Active Directory. In AAD, click into the "App registrations" section to view the application registration.
To view the changes for your Azure App Service, go to the portal, and go to App Services. Click into your App Service and then navigate to "Access control (IAM)". You should see an app listed under Contributor.
Summary
If you want to deploy to Azure from an on-premise TFS, you'll need to create an Azure Resource Manager Service Endpoint connection. Creating all the stuff you need in Azure and gathering the right IDs, can be a bit of a pain so I've created a PowerShell script to streamline the process.
Huge thanks to Simon Sabin for this blog post that helped me to get rolling with some of the more difficult bits of PowerShell + Azure.
I hope this helps.
-Ben
-- TFS DevOps got you down? Trying to connect TFS and Azure so you can do continuous delivery and automated releases? Are you dreaming of agility and Scrum awesomeness? Well, we can help. Drop us a line at info@benday.com.