[UPDATE 2/28/2017 -- If case you need it, here's the TFS2017 version of this guide.]
With Team Foundation Server 2015, there's a whole new build system with new build scripts and new build agents (aka. build servers). It's 100% different from the old XAML-style builds but it's also about 100% easier to use and set up. Ok...so this is going to sound weird but it's so easy to set up that it's hard. You're ready for the setup to be difficult and it's super simple and it's hidden in plain sight.
In this post, I'll give you a quick walkthrough for setting up a new build server.
Pre-requisites
So what are the pre-requisites? Well, on Windows, almost nothing. You need Powershell and .NET installed and that's about it.
Beyond that short list of required items, I think that there are some real nice-to-haves that make your life easier. First off, I'd install Visual Studio 2015 on that machine. You can do some basic builds using just the build agent but I usually find that I'll want a full version of Visual Studio installed in order to do any real, useful work.
Also, for permissions management, I'd create an Active Directory user that you'll use to as your build agent service account. You can run the build agent as pretty much any user account but I find that having a dedicated user account just for the build agent helps to make permissions management a lot cleaner and easier. I'd recommend using the official unofficial standard user account name of "TFSBuild".
Prepare to Download the Build Agent
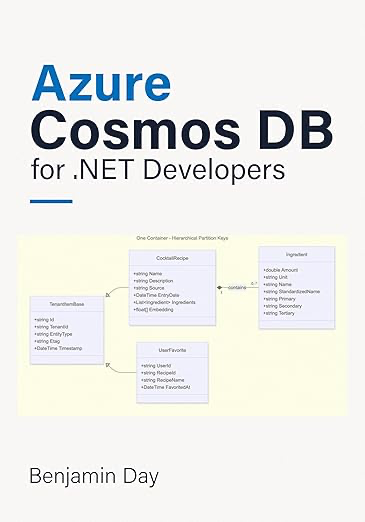
The TFS2015 build agent is now delivered via a zip file that you can download from your TFS machine. That download link is a little bit hidden. The first step is to open the web portal for your TFS team project. There are a handful of ways to open the Web Portal. If you already have Visual Studio open and you've already connected to TFS in Team Explorer, you can just click the Web Portal link in Team Explorer. Another way is to open a browser and navigate to http://your-tfs-name:8080/tfs.
When the web portal is open, you should see a page that looks something like the image below.
[caption id="attachment_6521" align="alignnone" width="934"]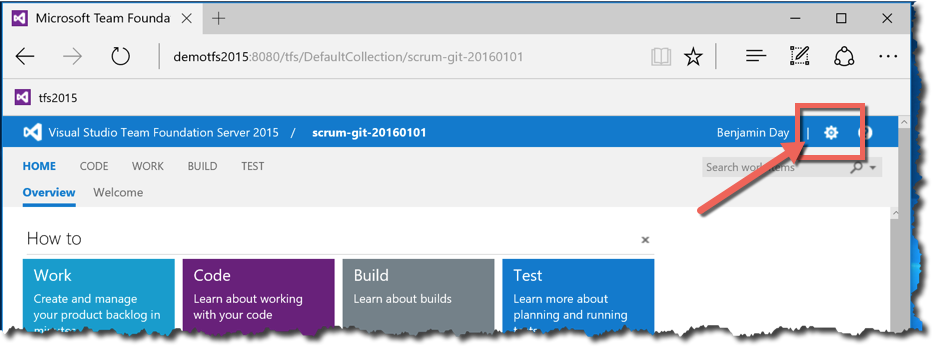 The TFS2015 Web Portal[/caption]
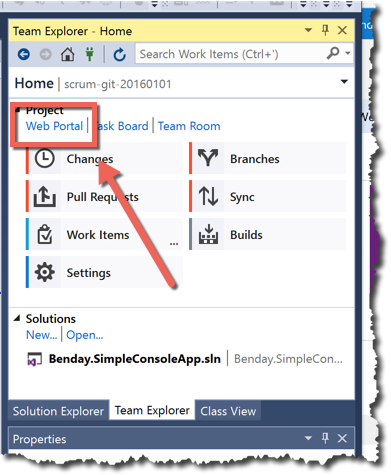
In the upper right, there's a gear icon that will take you to the admin page for your TFS team project. Click that gear. You'll eventually end up on a page that looks something like the image below. This is the administrative page for your TFS team project. Along the top of the page, you'll see a menu that says something like "Control Panel -> My Team Project Collection -> My Team Project". Since the TFS build services are configured at the Team Project Collection level rather than at the Team Project level, you'll need to go to the admin page for the Team Project Collection (TPC).
[caption id="attachment_6541" align="alignnone" width="626"]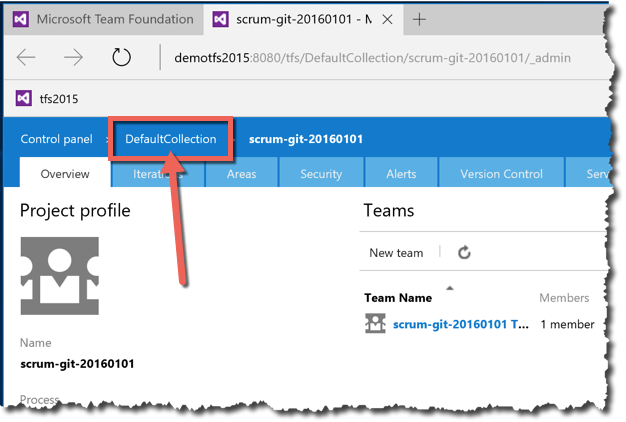 The admin page for your TFS2015 team project[/caption]
In the navigation menu at the top of the page, click the link for your Team Project Collection. In the image above, the TPC is DefaultCollection.
Once you've clicked the link, you should see an admin page for the TPC that looks like the image below.
[caption id="attachment_6561" align="alignnone" width="497"]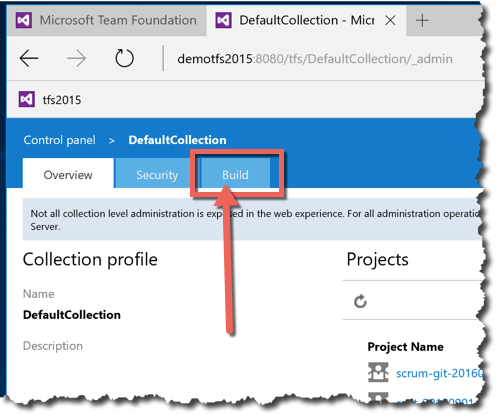 The Team Project Collection (TPC) admin page[/caption]
On the TPC admin page, you'll see several tabs across the top and one of them should say "Build". Click the Build tab to open the build pool administrator page.
Download the Agent
You should now see the build administration page and hidden in plain sight is a link to download the TFS2015 Build Agent. Click the "Download agent" link to download the zip file for the build agent.
[caption id="attachment_6581" align="alignnone" width="545"]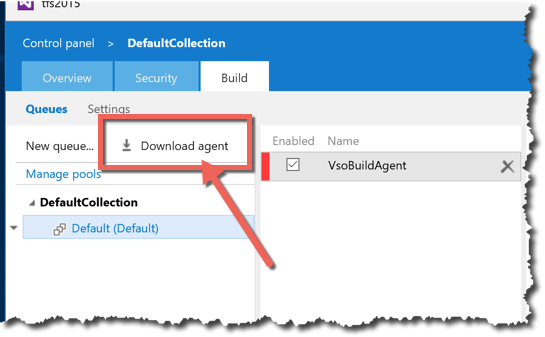 The download link for the build agent[/caption]
If you open your Downloads folder, you'll find a simple zip file named "agent.zip". That's the build agent.

Unzip the Build Agent (agent.zip)
Now that you've downloaded the build agent zip, you need to unzip it. I'd recommend unzipping to a directory off of the root of your drive called "tfsbuild" -- for example, C:\tfsbuild. (For the sake of simplicity, I'm going to assume that you did that.)
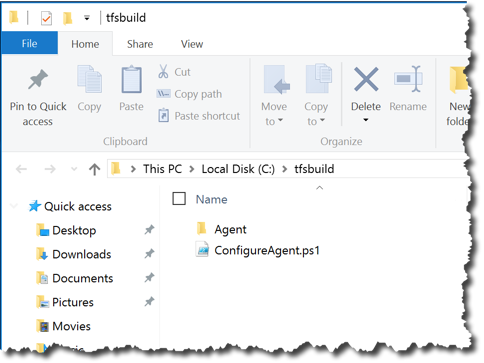
The contents of the TFS2015 agent zip
After you've unzipped agent.zip to c:\tfsbuild, you should see a folder that looks like this. You'll see a subfolder called Agent that contains the bits for the agent service and then also a ConfigureAgent.ps1 file. That ConfigureAgent.ps1 is a PowerShell script that you'll run in order to set up the build agent on this machine.
Configure the Agent using PowerShell
In order to run that ConfigureAgent.ps1 PowerShell script, I'd recommend opening a PowerShell console window that's running in Administrator mode.
[caption id="attachment_6641" align="alignnone" width="416"]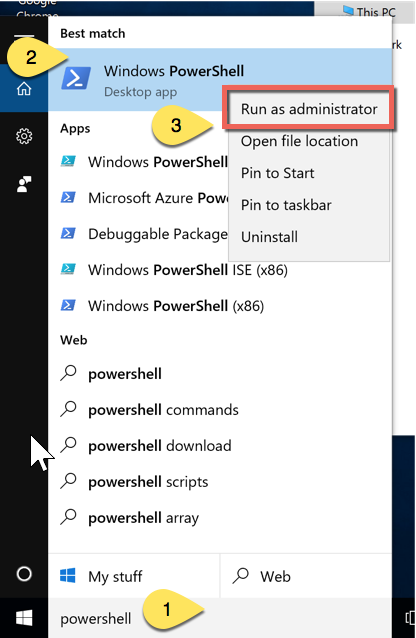 Run PowerShell in Administrator mode[/caption]
If you're running Windows 10, here's how to open PowerShell in Administrator mode. Click on the Start button. Type 'PowerShell'. You should then see "Windows PowerShell" in the results. Right-click "Windows PowerShell" and choose "Run as administrator".
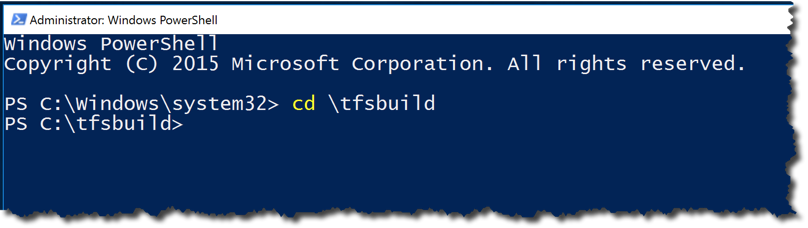
When the PowerShell window comes up type "cd \tfsbuild" and press Enter. This will put you into the tfsbuild directory that got created when you unzipped agent.zip.
Now that you're in the tfsbuild directory, you can run the configuration script. Type ".\ConfigureAgent.ps1" and press Enter.
[caption id="attachment_6681" align="alignnone" width="300"]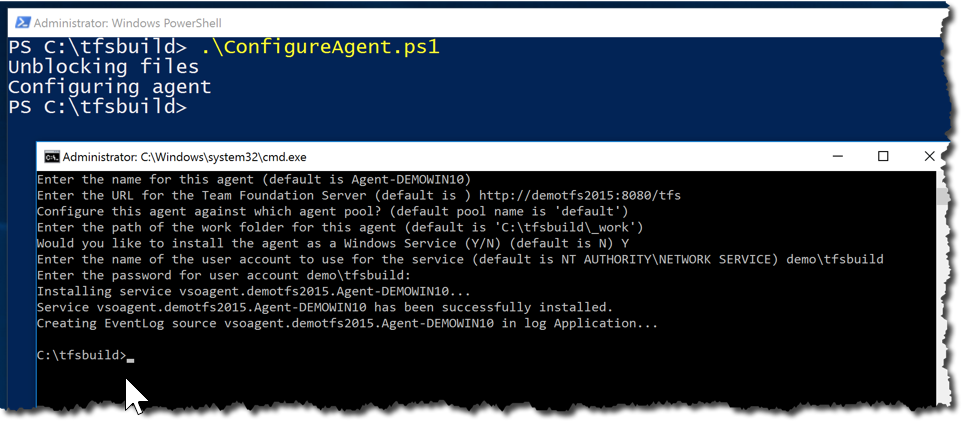 Configure the TFS2015 build agent[/caption]
This will prompt you for a handful of configuration options as shown in the image above. Each step will propose a default option and also allow you to specify your own custom value. If you want the default option, simply press Enter.
#1. "Enter the name for this agent (default is computername)" This is the name of the agent on this machine. Since you can have more than one agent, you might want to provide a more descriptive name. If you aren't getting fancy, you probably can just accept the default value.
#2. "Enter the URL for the Team Foundation Server (default is )" This option is asking you which Team Foundation Server that you want to connect to. Chances are high that the default value is empty and you'll need to provide a value. This is typically going to be 'http://my-tfs-name:8080/tfs'.
#3. "Configure this agent against which agent pool? (default pool name is 'default')" If you have more than one build agent pool configured for your Team Project Collection, you might want to configure this agent so that it's a member of a specific pool. If you've got a simple pool configuration, you should choose the default by pressing Enter.
#4. "Enter the path of the work folder for this agent (default is 'C:\tfsbuild\_work')" Make your life easy. Just use the default. Press Enter.
#5. "Would you like to install the agent as a Windows Service (Y/N) (default is N)" You almost definitely DO NOT want the default on this one. Unless you're running Coded UI tests or interactive Load Tests, you should type 'Y' and then Enter. This will configure this build agent to run as a Windows Service.
#6. "Enter the name of the user account to use for the service (default is NT AUTHORITY\NETWORK SERVICE)" Remember how I previously mentioned that I think it makes life easier to run the Build Agent as a dedicated Active Directory build account user? Well, here's where you'll use that value. Type the fully-qualified name of the user account -- domain\TFSBuild. In my case, my domain is named "DEMO" so I typed "DEMO\TFSBuild" and pressed Enter.
#7. "Enter the password for user account demo\tfsbuild:" Enter the password for the TFSBuild account and press Enter.
Now that you've finished entering all the configuration values, you should see some text that says "Installing service" and "Creating EventLog source".
Installing service vsoagent.demotfs2015.Agent-DEMOWIN10... Service vsoagent.demotfs2015.Agent-DEMOWIN10 has been successfully installed. Creating EventLog source vsoagent.demotfs2015.Agent-DEMOWIN10 in log Application...
Summary
That's it. Your build agent is configured and ready to use. In short, all you have to do is download the agent service bits ("agent.zip"), unzip that file, and run the PowerShell configuration script. Pretty simple, huh?
I hope this helps.
-Ben
-- Looking for help setting up Team Foundation Server 2015 (TFS2015)? Want some guidance on how to implement and customize TFS2015's new build system? Need to get this all working under Scrum? We can help. Drop us a line at info@benday.com.