The problem: in Angular, how do you break up a form into child components using @ViewChild() and still get validation to work?
When you're developing an application that has forms with a lot of data, it can get a little bit messy and repetitive. Specifically, I'm thinking about the display of validation messages and handling logic for dropdown lists (aka. input controls or comboboxes). If you're developing an application using Angular, the solution to this kind of sprawl is to start breaking your forms into multiple Components.
Sound easy, right? But then you have to worry about things like @ViewChild directives and FormGroup validation. I don't know about you but when I read the documentation isn't real clear on how this is supposed to work. Then mix in Reactive Forms and/or Typed Reactive Forms and it gets even harder to figure out.
Well, I think I've figured it out. And I've written a sample application and published the sample code. This first article gives a quick intro to the application and in future articles, I'll talk you through the implementation.
The Main Form of the Application
Everything starts from the MainFormComponent (main-form.component.html). This is the container for all the fields that we're trying to manage:
First Name
Last Name
Email
Status
Favorite Number (number as string)
Least Favorite Number (number as a number)
A couple of textbox controls (child component)
A combobox / dropdown / control (child component)
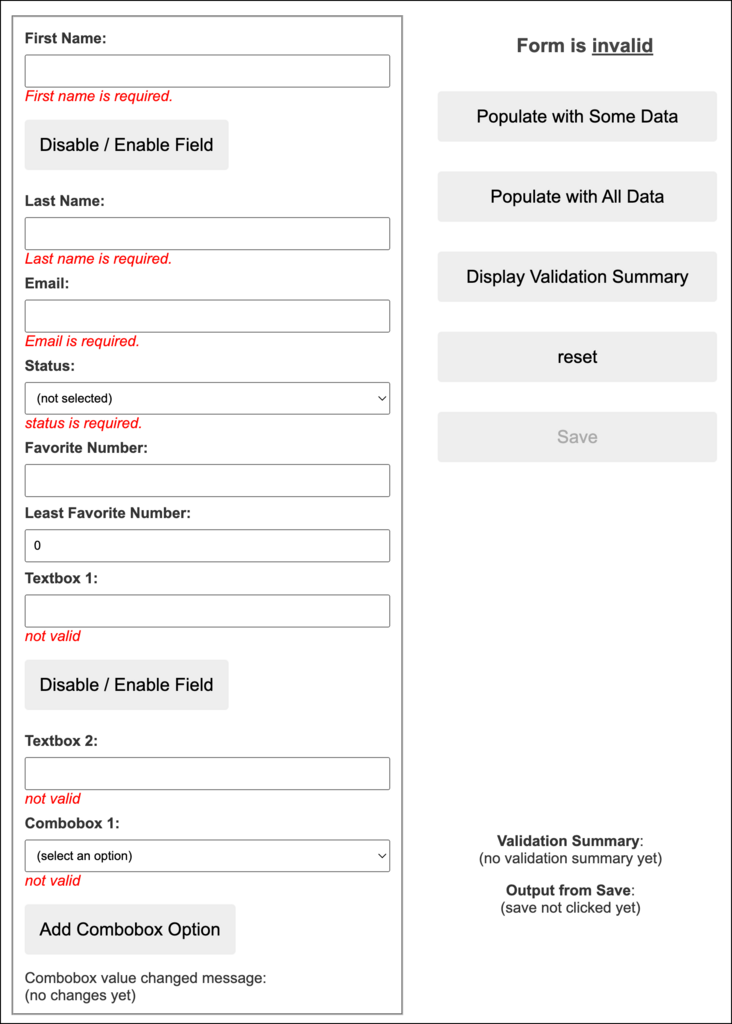
Screenshot of the sample application
This is a typed reactive form and all the form properties are created using the FormBuilder's nonNullable controls group. This also defines all the validation rules for those fields.
theForm = this.fb.nonNullable.group({
  firstName: ['', Validators.required],
  lastName: ['', Validators.required],
  email: ['', {
    validators: [Validators.required, Validators.email]
  }],
  status: ['', Validators.required],
  leastFavoriteNumber: this.fb.nonNullable.control<number>(0, {
    validators: [Validators.required,
    Validators.pattern('^-?[0-9]+(.[0-9]*)?$')]
  }),
  favoriteNumber: ['', {
    validators: [Validators.required,
    Validators.pattern('^-?[0-9]+(.[0-9]*)?$')]
  }],
  textbox1: ['', Validators.required],
  textbox2: ['', Validators.required],
  combobox1: ['', Validators.required],
});
Once this is defined, we can do type-safe operations against the form fields using the patchValue() method for setting values.
Summary
In this first article, I just wanted to publish the sample code and give you a quick look at the application. The sample application is running at this link and the sample code is published to GitHub. In future articles, I'll walk you through the implementation for the controls.
I hope this helps.
-Ben